Ready for flawless nails without stepping into a salon? Discover easy steps for a DIY manicure at home that’ll leave your hands looking like you just had a professional touch!
Introduction
In today’s fast-paced world, taking a break for self-care can feel like a luxury, but it doesn’t have to be. One fantastic way to unwind and treat yourself is by giving your nails a little love—and guess what? You don’t even need to leave your house! Doing a manicure at home is not only budget-friendly, but it can also be super relaxing and satisfying. Whether you’re prepping for a special occasion or just want to keep your hands looking fresh and fabulous, learning a few simple steps can make all the difference. In this article, we’ll guide you through easy steps to achieve a salon-worthy manicure at home.
Why DIY Your Manicure?
You might be wondering, why go through the hassle of doing your own nails when there’s a professional on every corner? Well, here are a few reasons to consider a DIY manicure:
- Convenience: No appointment necessary! You can do it whenever it suits you.
- Cost: Save those bucks for something else—you won’t need to shell out for a salon visit.
- Creativity: Doing your own nails gives you complete freedom to experiment with styles, colors, and designs.
- Self-care: It’s a therapeutic process. Trust me, it feels great to pamper yourself, even if it’s just for 30 minutes.
Step-by-Step Guide: Manicure at Home Easy Steps
1. Gather Your Tools
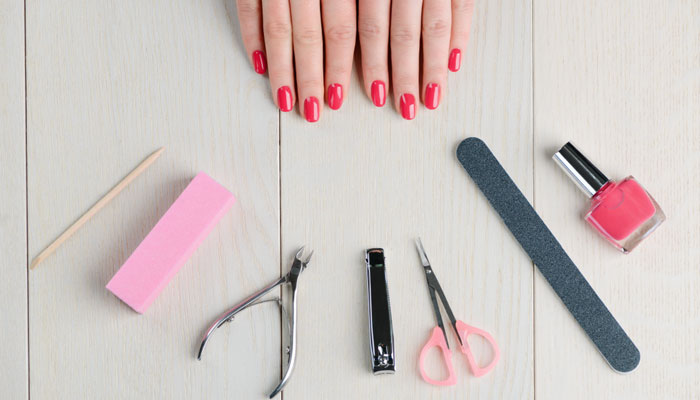
First things first—you need the right tools. Don’t worry, they’re pretty basic, and you can find them in any drugstore or beauty shop. Here’s a quick checklist of what you’ll need for a successful at-home manicure:
- Nail polish remover
- Cotton balls or pads
- Nail clippers
- Nail file and buffer
- Cuticle pusher or orangewood stick
- Cuticle oil
- Hand lotion or cream
- Base coat, nail polish, and topcoat
2. Remove Old Nail Polish
It might seem obvious, but starting with a clean slate is crucial. If you’ve got remnants of old polish on your nails, it’s time to say goodbye! Use nail polish remover and a cotton pad to wipe away any old color. If you’re wearing glitter polish (oh, the struggle!), soak a cotton ball in remover, place it on the nail, and wrap it in a small piece of aluminum foil for about 5 minutes. That’ll get rid of the stubborn stuff without too much effort.
3. Trim and Shape Your Nails
Next up: trimming and shaping. Using a nail clipper, trim your nails to your desired length. If you’re going for a specific shape—like square, oval, or almond—now’s the time to sculpt your nails. Gently file in one direction (this reduces the risk of splits and tears), and buff the top of each nail for a smooth finish.
Pro tip: Don’t go too wild with the buffer! Over-buffing can weaken your nails.
4. Soak and Exfoliate
Now it’s time to pamper those hands! Fill a bowl with warm water and a little gentle soap, and soak your hands for about 5 minutes. This softens the cuticles and preps your nails for the next steps. After soaking, gently pat your hands dry.
Once they’re dry, use a gentle scrub or exfoliator to buff away any dead skin around your nails and hands. You can even DIY your own exfoliating scrub by mixing sugar and olive oil together. Give your hands a light massage as you scrub, focusing on areas where the skin tends to get dry.

5. Tackle Your Cuticles
Cuticle time! Take a cuticle pusher (or orangewood stick) and gently push back your cuticles. Avoid trimming them unless they’re super overgrown because cuticles actually help protect your nails from infection. If they’re dry or ragged, apply a little cuticle oil to keep them soft and healthy.
6. Moisturize Your Hands
Moisturizing is a must! After all that soaking and exfoliating, your hands will be crying out for some hydration. Massage a rich hand lotion or cream into your skin, paying special attention to the cuticles and nails. The result? Super soft, silky hands that look as good as they feel.
7. Apply a Base Coat
Now for the fun part—painting! Before you go wild with your favorite color, always start with a base coat. Why? Because a good base coat not only smooths out the surface of your nails, but it also extends the life of your manicure and prevents staining (especially with darker colors). Let it dry for a minute or two before moving on to the next step.
8. Time for Nail Polish
Here comes the color! Start with a thin layer of your chosen polish—thin layers dry faster and last longer. Begin with a swipe down the middle of your nail, then fill in the sides. It might be tempting to apply a thick coat, but trust me, thin and steady wins the race. Wait a couple of minutes before applying a second coat. This gives the first layer time to dry and helps prevent smudges.
Pro tip: If you tend to get polish on your skin, try using a small brush dipped in nail polish remover to clean up any mistakes.

9. Seal It with a Top Coat
Once your color is in place, seal it in with a top coat. A top coat is like the protective armor for your polish—it adds shine and prevents chips. Bonus: some top coats come with UV protection, which helps your polish from fading too quickly. Apply your top coat, and voilà, your nails are now looking glossy and perfect!
10. Let Them Dry
The hardest part of any manicure? Waiting for your nails to dry! Give yourself at least 10-15 minutes to let the polish fully set. During this time, resist the urge to touch anything or wave your hands around like a maniac. If you’re in a hurry, you can dip your nails into a bowl of cold water for a few minutes to speed up the drying process.
FAQs on Manicure at Home Easy Steps
1. How often should I do a manicure at home?
It depends on your nails and how fast they grow, but a good rule of thumb is every 1-2 weeks. Regular maintenance keeps your nails healthy and looking polished.
2. How can I make my manicure last longer?
There are a few ways to extend the life of your at-home manicure:
- Always use a base coat and top coat.
- Reapply the top coat every few days for extra shine and protection.
- Wear gloves when doing chores to protect your nails from chipping.
3. What if my nails are weak or brittle?
If your nails are feeling fragile, try incorporating more nail-strengthening products into your routine. Cuticle oil, nail hardeners, and biotin supplements can all work wonders in keeping your nails strong and healthy.
4. Can I skip the base coat?
It’s best not to! A base coat smooths out your nails and prevents staining. If you want your manicure to look its best and last longer, don’t skip this step.
5. How do I remove nail polish without damaging my nails?
Use a non-acetone nail polish remover for a gentler approach, especially if your nails are prone to dryness. Acetone works faster but can be more drying, so balance it out with a good cuticle oil afterward.
Conclusion
Doing a manicure at home is not only easy, but it’s also an enjoyable way to indulge in a little “me time.” By following these easy steps, you can have salon-worthy nails right in the comfort of your own home. With just a few tools and a bit of practice, you’ll soon be rocking flawless nails without the fuss of heading to the salon. So go ahead, grab your favorite polish, and give yourself that much-deserved manicure! Happy pampering.