Achieve salon-worthy sleekness right at home! Discover the ultimate step-by-step guide to hair straightening at home with tips, tricks.
Straight, shiny hair never goes out of style. Whether you’re getting ready for a night out, a big meeting, or just want a new look, straightening your hair can give you that polished, sleek vibe in no time. But heading to the salon every time you want smooth, straight strands? That can be expensive, time-consuming, and downright inconvenient. Lucky for you, hair straightening at home is completely doable with the right tools, techniques, and—most importantly—knowledge.
In this article, we’re going to break down the steps for hair straightening at home so you can achieve professional-looking results without stepping foot outside your bathroom. We’ll cover the essentials, from prepping your hair to avoiding heat damage and even addressing common issues like frizz and flyaways. Let’s get started!
Prepping Your Hair: Laying the Groundwork
Before you dive in with the flat iron, it’s crucial to prep your hair properly. Skipping this step? Big mistake. Just like you wouldn’t paint a wall without priming it first, you shouldn’t heat style your hair without proper preparation. Why? Well, prepping minimizes damage, maximizes sleekness, and ensures your straightened hair lasts longer.
1. Wash and Condition Your Hair
The foundation of a smooth, straight look starts in the shower. Here’s what you need to do:
- Use a smoothing shampoo: Look for shampoos labeled as “smoothing” or “anti-frizz.” These contain ingredients that can help tame unruly hair and make it easier to straighten.
- Condition generously: Go for a deep-conditioning treatment or a hydrating conditioner that adds moisture. This is especially important if you have curly, coarse, or dry hair since straightening can suck the moisture out of your locks.
2. Detangle, Baby!
After you’ve towel-dried your hair (don’t rub—just gently squeeze the water out), use a wide-tooth comb or a detangling brush to work out any knots. If you skip this step, you’re bound to encounter tangles later that’ll catch in your flat iron. Ouch!
3. Apply Heat Protectant
If there’s one non-negotiable step in the process, this is it. A heat protectant spray or serum acts like a shield between your delicate strands and the scorching heat of your straightener. Here’s the key: distribute it evenly! Apply it section by section, from roots to tips, to ensure every part of your hair is coated. Without it, you’re basically asking for damage and breakage.

Drying Your Hair: The Essential Pre-Straightening Step
This is a step that a lot of people tend to rush through or even skip, but it’s super important to make sure your hair is completely dry before using any heat tools. Straightening damp hair can cause significant damage (think steam, sizzling, and snapping strands).
4. Blow-Dry With a Paddle Brush
For a truly sleek and smooth look, blow-drying your hair before straightening is a game-changer. Here’s how to do it like a pro:
- Section your hair: This makes the process so much easier and ensures you dry each part evenly. Clip away sections and start at the bottom, working your way up.
- Use a paddle brush: A large paddle brush helps pull the hair straight as you blow-dry, minimizing frizz and helping create a smooth foundation for the flat iron.
- Use medium heat: Go for medium heat, not scorching hot air. Remember, you’ll be adding more heat when straightening, so don’t go overboard now.
If you’re in a rush, you can use the cool shot button at the end of blow-drying each section to lock in smoothness. But if you’ve got time? Give your hair a couple of minutes to cool down naturally before straightening.
The Main Event: Steps for Hair Straightening at Home
Finally, we get to the straightening part! This is where the magic happens—if you do it right.
5. Section Your Hair Again
If you’re going in blind and trying to straighten everything at once, stop right there. The key to sleek, straight hair is working in small sections. This gives you control, helps prevent damage, and ensures every strand gets properly straightened.
- Clip up your hair into sections—start with small sections at the bottom and work your way up.
- Thin sections = better results: Keep each section thin, no thicker than an inch. The thinner the section, the easier it’ll be for your flat iron to do its job without having to go over the same spot multiple times.
6. Choose the Right Heat Setting
More heat doesn’t always mean better results. It’s all about finding the sweet spot depending on your hair type:
- Fine or damaged hair: Stick to 250°F – 300°F. You want to protect those delicate strands.
- Normal hair: 300°F – 375°F is a safe bet.
- Thick or coarse hair: You’ll likely need the higher settings, around 375°F – 450°F, to get it smooth.
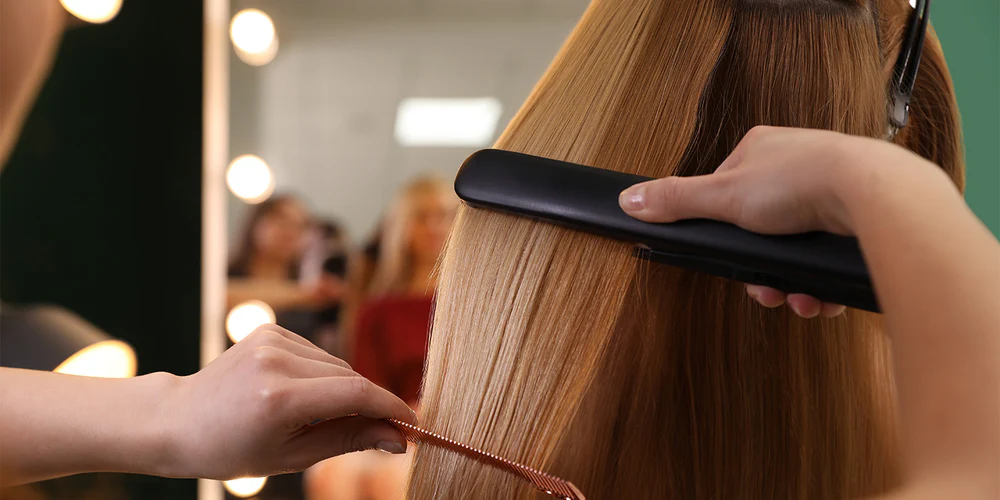
7. Start Straightening
Now, it’s time to work your flat iron magic. Here’s a simple breakdown:
- Start at the roots: Clamp your flat iron at the root of your hair section and slowly move it down toward the ends. Don’t linger in one spot for too long—doing so will cause excessive heat damage.
- Slow and steady: Glide the iron smoothly and slowly down each section to avoid frizz and unnecessary heat passes.
- One pass is ideal: If your hair’s prepped well, one pass should be enough for each section. If it’s not quite there, a second pass is fine—but anything more could damage your strands.
Post-Straightening: Locking In the Sleek Look
You’ve put in all that work to get your hair straight and smooth, so now it’s time to keep it that way. Post-straightening care is just as important to maintain the look and prevent frizz from creeping back.
8. Apply a Finishing Serum or Oil
After you’ve straightened your entire head, give it a final touch of shine and protection by applying a serum or light oil. This step does wonders for keeping frizz at bay and giving your hair a glossy, smooth finish.
- Focus on the ends: Don’t apply too much product at the roots unless you want to end up with greasy-looking hair.
- Less is more: Just a small amount is enough, and rub it between your palms before smoothing it over your hair.
9. Cool Down Your Hair
Let your hair cool completely before stepping out or styling further. This helps lock in the sleekness you’ve worked so hard to achieve.
Troubleshooting Common Hair Straightening Issues
Even with the best of intentions, things don’t always go according to plan. Here’s how to troubleshoot some of the most common hair straightening problems:
Why Won’t My Hair Stay Straight?
Your hair keeps frizzing up or reverting to its natural texture after straightening? Don’t panic. Here are some things to check:
- Humidity levels: If it’s humid, your hair will fight to go back to its natural state. Use an anti-humidity hairspray.
- Heat setting too low: Your flat iron might not be hot enough. Remember, thicker hair requires higher heat.
- Skipping product: Not using a heat protectant or a smoothing serum might be the issue.
Why Does My Hair Smell Burnt?
Yikes, nobody wants that burnt hair smell. It’s usually a sign of heat damage. To avoid this:
- Don’t use too much heat: Stick to the recommended heat settings for your hair type.
- Clean your flat iron: Product buildup can cause burning smells, so wipe down your flat iron after each use.
FAQs: Your Hair Straightening Queries Answered
Q: How often can I straighten my hair without causing damage?
A: It’s best to limit straightening to 1-2 times a week. Overuse of heat tools can lead to breakage and damage, especially if you’re not protecting your hair properly.
Q: Do I need to use a special shampoo for straightened hair?
A: While you don’t necessarily need a specific shampoo for straightened hair, using a sulfate-free, moisturizing shampoo helps maintain your hair’s health and shine, prolonging the sleekness.
Q: Can I straighten my hair without a flat iron?
A: Yes! You can try blow-drying your hair straight with a round or paddle brush, or using a smoothing balm and wrapping your hair while it air-dries. There are also heatless straightening methods like “hair banding” or using hair rollers.
Conclusion
With the right prep, tools, and techniques, achieving straight, smooth hair at home is totally possible! Remember to take your time, protect your strands, and follow these steps for hair straightening at home for salon-worthy results without the hefty price tag. Whether it’s a quick fix or a long-term styling routine, knowing how to properly straighten your hair will keep your locks looking sleek and healthy in the long run.